Wednesday 29 January 2014

Mochai Kathirikai Varuval/Fresh Limabeans and brinjal Curry Recipe

I love the pongal season/January as it marks the beginning of summer and you can get your hands on some of the fresh produce.It is only during this season of January /February that you can find fresh mochai/lima beans in TamilNadu.These our one of my favourite legume whether fresh or dried (I have not tasted the canned or frozen ones).This mochai is a must to be added to the pongal kuzhambu or it is prepared in some form or the other on pongal day.So I thought that this would be the right time for me to prepare and post a dish using mochai.
Lima beans /mochai are rich in protein.It is suitable for people on diet as it is rich source of soluble and insoluble dietary fiber .It also aids in detoxification.Lima beans serve as a very good source of anti oxidants and folic acid.These beans contain a good carbohydrate that helps in proper metabolism.So try to include these beans in your regular diet especially those who are planning to lose weight.
Mochai Kathirikai Varuval Recipe

Method:

  1. Pressure cook the mochai with some salt and 1/2 tsp of chilly powder until soft (2 whistles).Heat oil in a pan, add the mustard seeds and once they splutter and the curry leaves.
  2. Now add the chopped onions and saute it for 2 minutes ,add the tomatoes and saute till the tomatoes become mushy,now add the powders and toss it so that all the masala powders coat well.
  3. Now add the cubed brinjal and mix well till the brijal changes color to brown , now you can close the pan and cook the brinjal in slow flame till they are cooked soft but take care not to over cook them.Now add the required salt.(remember that we have added salt to the mochai).
  4. Add the cooked mochai to the brinjal and toss them well till the mochai is well coated with the masala. Swtich off the stove and serve the curry with rice and sambhar, rasam or curd you can also have as subji with your roti it tastes great.
Mochai Kathirikai Varuval Recipe

My Notes:

  • The mochai/lima beans has to be cooked soft and not mushy.
  • You can add Fennel seeds powder gives a distinct aroma to the dish, or you can even use fennel seeds while tempering instead of the powder.
  • Mine was mildly spiced you can increase the red chilly powder as per your taste.
  • You can either slice the brinjal to thin circle or cube them .
  • I have used fresh lima beans /mochai you can substitute with dried/canned or frozen ones.
  • Chop the brinjal only when you are going to cook it ,or else keep the cut ones immersed in water as they tend to change color .Best to chop them in the last minute to avoid the brinjal turning bitter.


Monday 27 January 2014

Godhuma Rava Upma/Wheat Rava Upma in Pressure Cooker(Biriyani style)Recipe

Today's recipe is a simple breakfast or dinner recipe.Its a healthy one rich in fiber.This dish I had clicked about 2 weeks back at dinner time so kindly excuse me for the poor lighting. I am a great fan of this upma dating back to my school days. Amma used to make this for breakfast as it is A ONE POT MEAL. I have tried making it more nutritious by adding veggies.This upma serves as wholesome meal with all veggies packed it can even be served with some curd/raita as it tastes almost like a vegetable biriyani. This upma can be had when you are on a diet and long to have a biriyani.This godhuma rava is a whole grain product and hence much healthier option than rice.
Godhuma Rava Upma (Biriyani style)Recipe

Method:

  1. Heat oil and ghee in a pressure cooker ,add the items in "to temper" followed by the onion and saute well.Then add the tomato,green chilly,mint leaves saute for a minute and then add the ginger garlic paste and saute well.
  2. Now add all the vegetables ,turmeric powder , salt and mix everything well.You can now add the wheat rava to the cooker and mix together with the masala for about a minute . Add the water (2 cups) check for salt,bring it to a boil ,close the lid and pressure cook for about 2 whistles(depends on your cooker).
  3. Once the pressure cooker is released add the chopped coriander , mix well and serve hot with sambhar,coconut chutney or even raita.
Godhuma Rava Upma (Biriyani style)Recipe

My Notes:

  • As there are veggies added to the upma you don't need any side dish as such.
  • This upma tastes best when served hot.
  • You can also avoid ghee and do the tempering in oil but this compromises on taste so you can reduce the amount of ghee if you wish.
  • Choice of veggies is yours, you can veggies or prepare it without them.
  • You can increase the amount of water to 2 1/2 cups if you like your upma mushy.
  • Adjust chillies according to taste.
  • Mint leaves though optional gives the humble upma a facelift.
  • This upma can also be prepared in a pan/kadai but time may vary.I always find it easier in cooker as the vegetables added especially peas cooks well in cooker.

Friday 24 January 2014

Mint Flavoured Paneer Tikki/Pudina Paneer Tikki Recipe

I somehow was greatly impressed by the paneer jamun sharmilee had posted and was waiting to try it.When I could get my hands on this malai paneer at nilgiris I was thrilled that I could try this paneer jamun to surprise Sharu when she comes back from school.So after preparing the regular lunch I was all set to prepare the jamun.The dough was ready,but on dropping it in the oil,to my dismay I saw the jamuns disintegrating in the oil,some started developing a tail I really couldn't figure out what went wrong with the dough.Tried out the next batch and then the 3rd batch also but their shapes changed,it was then I knew that this is not going to work and stopped with the 3rd batch and started thinking of alternate ways to use up the dough first thought of preparing malai kofta but that needed other veggies to be chopped and steamed,so a big no to that,I also had a boiled potato on hand (thats nice)so mixed this up with the dough then thought about flavoring , my eyes fell on the mint leaves and so was born the mint flavored paneer tikkis. Oh ! such a long story for such a simple dish.
About the taste ,the tikkis were bursting with the flavor of mint which I loved greatly.These tikkis also got a thumps up from the kiddo once she was back from school.So if you are looking for a snack for the little one who comes back from school this is for you. I did not add chillies but did not feel the need for spiciness due the over whelming flavor of mint.Mint is said to aid digestion,so no need for ginger.This a easy peasy recipe which does not require any chopping of onions neither any grinding.
Mint Flavoured Paneer Tikki Recipe

Wednesday 22 January 2014

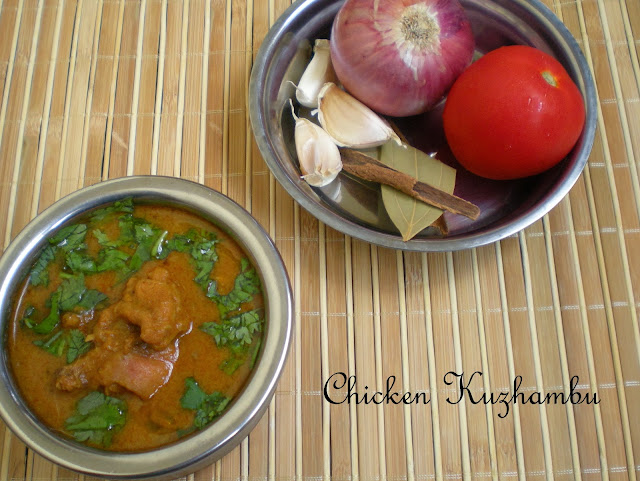
Chicken Kuzhambu (with coconut)Recipe

It was Sunday morning and I was planning for the lunch menu, as usual it was chicken,sharu and hubby wanted a chicken biriyani but I wanted to try out some new recipe (hehe blogging fever you see).But suddenly all plans got changed and I had to go shopping for new grinder in the morning not as planned in the afternoon .So I just left the marinated chicken in the fridge and off I went and was back only by 12 '0' clock,Oh I had only about 45 minutes on hand to whip up my lunch,and sharu had already started that she was hungry.I just then remember this quick recipe which I got from a friend and immediately went a head preparing this kuzhambu. This kuzhambu as my friend said was her mothers style of preparing kuzhambu. Although the list in roast and grind look long this recipe can be whipped up in a short while. Some how the chicken Kuzhambu was ready by 12.45pm as usual I clicked the photos and then started laying the table for lunch. The kuzhambu came out well and everybody enjoyed their lunch.
Chicken Kuzhambu (with coconut)Recipe

Method:

  1. Marinate the chicken for 1/2 hour with the ingredients in "To Marinate".In the meantime you can roast the items in the "To roast and grind" allow it to cool and grind it to a fine paste.
  2. Now heat oil in a pressure cooker add the ingredients in the "To Temper "list followed by the onions, when the onions turn pink add the chopped tomato and saute well .You can now add the powders , saute well add the marinated chicken,followed by salt and mix well till it is coated well with the masala.
  3. At this stage add the ground mix to the chicken , mix well, and add a cup of water and pressure cook the chicken for three whistles.After the pressure is released check for seasoning and allow the kuzhambu to boil for some more time till it reaches the required consistency.(If its too thick add some water and allow it to boil).
  4. Garnish with coriander leaves .Now your chicken Kuzhambu is ready to be served with hot rice,idly,dosa ,roti or even with a mild pulav.
Chicken Kuzhambu (with coconut)Recipe

My Notes:

  • Fried gram thickens the kuzhambu so add water accordingly.
  • You can substitute fried gram with cashews for a richer version.
  • You can even cook the kuzhambu in a pan instead of pressure cooker but it takes longer to cook.
  • This kuzhambu is of apt spiciness for our taste buds.Adjust the chilly powder to your taste.
  • You can add ginger garlic paste instead of grinding fresh ones but freshly ground masala add taste to the kuzhambu.

Monday 20 January 2014

Sambhar Sadham Recipe

Hai everybody hope you all had a great week-end .We were quite busy with sharu's school assignments but it went on well.I have bought a baking tray and we are planning to bake a cooker cake some time soon.I wanted to by some props for my blog but was not satisfied with ones I saw, so planning to visit shops next weekend.Now coming to todays recipe its a no fuss recipe which does not require any grinding how cool is that.I was quite lazy (as usual) so prepared sambhar rice using sambhar powder available rather than making a fresh one.Its ok it helps when you are rushing and want a quick fix rather than a whole spread but no compromise on health ,all veggies are added.In my rice all the veggies got over cooked,but this is a way to feed kids who hate veggies.Now off to the recipe.
Sambhar Sadham Recipe

Method:

  1. Pressure the rice and dhal together with 1/2 tsp of turmeric and a pinch of hing in 4 cups of water.Meantime you can chop all the veggies and keep them ready,and soak the tamarind in warm water.
  2. Now heat oil in a kadai/pressure pan ,add the peeled onions and saute well followed by tomato,saute for a minute,then add carrots, beans and radish and saute well.
  3. Now you can add the chopped brinjal followed by the powders ,add 1/2 cup of water and cook till all the veggies are cooked.Then add the required salt and tamarind juice (about half a cup thick pulp).Let the mix boil till almost all the water has evaporated and raw smell leaves,now add the jaggery.
  4. Mash the cooked rice and dhal mix with a ladle, add the rice mix to the kadai or transfer the veggies mix to the cooker whichever is convenient and mix well,add the coriander leaves and check for seasoning.
  5. Heat ghee in a small pan add the items under "to temper" list once the mustard starts cracking add this to the Sambhar rice and serve hot with papad.
Sambhar Sadham Recipe

My Notes:

  • As there are veggies added to the rice itself you don't need any side dish as such.
  • This rice tastes best when served hot.
  • You can also avoid ghee and do the tempering in oil but this compromises on taste so you can reduce the amount of ghee if you wish.
  • Choice of veggies is yours you can add drumstick,potato etc.
  • You can reduce the amount of water to rice if you do not like your rice mushy.
  • Adjust spice level,tamarind according to taste.
  • This rice thickens with time so prepare accordingly.

Friday 17 January 2014

Pachai Pattani Poriyal/Green Peas Poriyal Recipe

After having heavy meals for the past 2 or 3 days thanks to pongal celebrations we wanted to have something light as well as easy to cook,so chose to prepare this simple peas poriyal.Now the Vegetable market is loaded with lots and lots of fresh green peas soI am tempted to prepare various dishes that use peas as peas are seasonal and are available only for few more months.Not that they are not available at other times but they aren't fresh as in this season.Moreover I hear people say that all vegetables and fruits are best had when they are in season.Whenever I prepare this poriyal I am reminded of my uncle who was a great fan of this poriyal. This poriyal used to be prepared almost 3 times a week just for him.
Now coming to the health benefits of green peas they are one of the most nutritious leguminous vegetable rich in phyto -nutrients, minerals, vitamins and anti-oxidants.Green peas are a rich source of folic acid,vitamin c ,B-complex and vitamin k.They play a great role in protection against stomach cancer.As against the belief that peas due to their sweet taste are not fit for diabetic patients , it has a low glycemic index and are diabetic friendly.Now with no more ramblings off to the recipe.
Pachai Pattani Poriyal/Green Peas Poriyal Recipe

Method:

  1. Pressure cook the peas with a pinch of salt and some water for 2 whistles or till done (soft but not mushy).Drain the water from the peas and reserve that water.
  2. Heat oil in a kadai add the items in to temper list followed by the onions and a pinch of salt and saute well.Now you can add the reserved water to the onions let them cook.
  3. Add the cooked peas after all the water has dried up check for salt ,switch of the stove and add the grated coconut ,mix well and serve with sambhar/rasam rice.
Pachai Pattani Poriyal/Green Peas Poriyal Recipe

My Notes:

  • This recipe suits best for fresh peas not for dried ones.
  • You can opt for a no onion version also .
  • You can even add regular onions but shallots or chinna vengayam tastes better.
  • A tip to retain the green color even after pressure cooking is to release the pressure manually by cooling it down and releasing it immediately .

  • Coconut can be omitted if you are on diet.
  • Wednesday 15 January 2014

    Sakkarai Pongal (in pressure cooker)Recipe

    Todays post is sakkarai pongal I know that everybody is familiar with this dish and this being pongal time all would have got enough of it but still I want to have a note of it in my little space.Hope every one would have had a great time with family and friends,especially in Tamil Nadu kids are having a whale of time enjoying their pongal holidays.In our house we have the custom of making sakkarai pongal and vadai on the day of pongal.I usually follow the short cut method of pressure cooking which is easy and time saving.Traditionally this pongal is prepared in a new earthern pot.Usually everyone adds only few spoons of moongdhal to the pongal but we use rice and dhal in the ratio 2:1,Amma does it that way so I follow the same ratio.
    Sakkarai pongal is a favorite among kids and it is a whole meal by itself with carbs , protein ,vitamins and minerals. Moong dhal is easy to digest and attributes to the protein component. Jaggery is rich in iron,vitamins and minerals. Jaggery is said to have properties that aid digestion of food.A small piece of jaggery after a heavy meal helps in digestion.A friend of mine suggested that I include recipes that make up a healthy breakfast for kids.This pongal also comes under that category,it is a one pot meal and also loved by children,so mothers need not go around the kid to feed the breakfast.Now to the recipe.
    Sakkarai Pongal Recipe

    Method:

    1. Wash and pressure cook the rice and dhal together in 3 cups of water with a pinch of salt for three whistles(please adjust according to your cooker).
    2. Now in a pan heat jaggery with the crushed elaichis in 3 tbspn of water till the all jaggery melts and you get a thick syrup.Strain this syrup into another bowl.
    3. Once the rice ,dhal mixture is ready mash it well and add the jaggery syrup to the cooker ,mix well and cook till the jaggery and rice mix come to a boil add 2 tbsps of ghee and keep stirring else the pongal may get burnt.Heat 2 tbsps ghee in a pan ,fry the cashews and raisins and add it to the pongal.Serve hot.It tastes equally yummy even at room temperature.
    Sakkarai Pongal Recipe

    My Notes:

    • You can increase or reduce the amount of jaggery as per taste.
    • The colour of the pongal depends on the jaggery used ,paagu vellam gives good color.
    • You can decrease the amount of water if you don't want your pongal to be gooey .
    • The use of cashews and raisins is optional and can be omitted if you don't like it.
    • A pinch of salt is added to the rice dhal mixture to avoid/reduce spill over,moongdhal has this quality. A tip from a chef was to add a pinch of salt to any sweet dish to enhance the taste.
    • You can reduce the amont of ghee but this sure compromises on the taste.

    Tuesday 14 January 2014

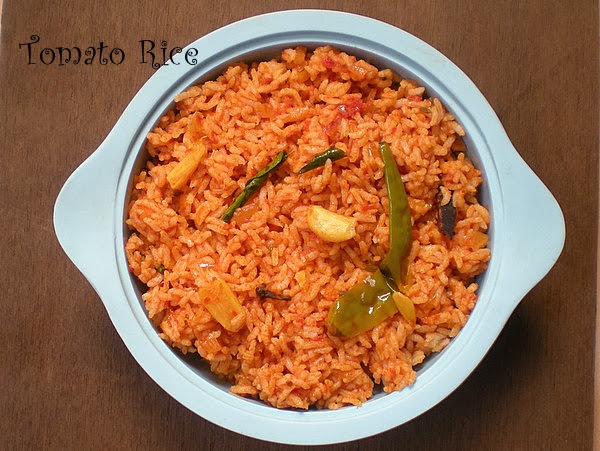
    Spicy Chettinadu Style Tomato Rice Recipe

    Everybody will be celebrating Pongal today.In Chennai it is holiday season literally.The kids are having a long holiday for nearly 6 days.Having a tough time having the kid at home and keeping her engaged all through the day.Today's recipe is tomato rice,as I told we like to have variety rice often so we try checking for new variety rice recipes.This rice as usual is Amma's recipe.This is a chettinadu style recipe.The original recipe doesn't require any grinding but I puree the tomatoes. The tanginess of the tomato,spiciness of the chilly and flavor of garam masala make this tomato rice very special.
    Wishing Everyone a Happy Pongal.
    Spicy Tomato Rice Recipe

    Method:

    1. Heat oil in a kadai add the items to temper followed by chopped onions and garlic saute well and add the chopped tomato and all the masala powder and salt.In meantime puree the other 3 tomatoes and add it to the kadai .Close the lid of the kadai let the mix boil till the oil starts floating.
    2. After the tomato mix is ready add the cooled rice and mix well and check for seasoning.Serve hot with onion raita or chips.
    Spicy Tomato Rice Recipe

    My Notes:

    • This rice is best suited for lunch box as you can make the tomato mix the previous night and store it in the fridge and mix it with the rice in the morning.
    • The tomato mix can be used as tomato thokku as such with dosa or chappathi.
    • Once the tomato mix is ready you can add ground coconut paste to it and your tomato kurma is ready.
    • This tomato mix is handy so you can make it before hand and store it.
    • I chopped only one tomato and pureed the other 3 you can add all chopped tomatoes,this makes the dish much tastier but the kid doesnt like the skin of tomatoes in the dish so I purred them.Actually chooped tomatoes cook faster.
    • Adjust the spice level to taste.

    Saturday 11 January 2014

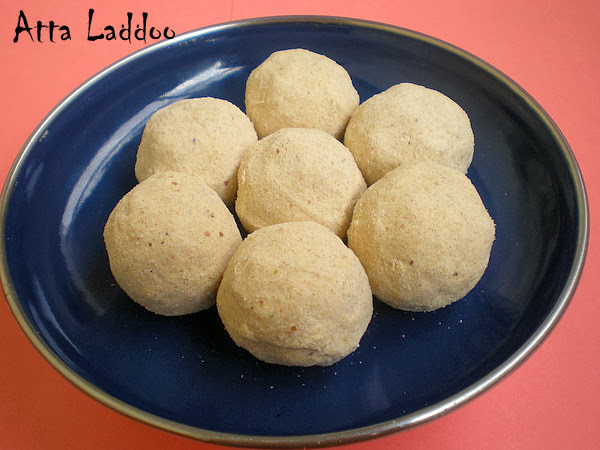
    Atta Laddoo Recipe

    We went to visit my parents .I wanted to make something simple and light for my parents,so decided to make these atta laddoos.First I was sceptical about making laddoos with wheat flour/atta as I thought it would have the raw smell of atta,but some how decided to go head with this and my hesitation did prove me wrong, the laddoos came out well.Later I repented for making it in such a small quantity and everybody loved it.I got this recipe from sharmis passions,but increased the sugar quantity as we prefer sweet on the higher side.The laddoos came out in a melt in mouth consistency and the addition of powdered nuts added to the taste,just loved the idea of adding powdered nuts yummm. The sun here was playing hide and seek hence the difference in colour in the two photos.
    Whole wheat flour has numerous health benefits.It is rich in dietary fibre which reduce the risk of colon cancer.Whole wheat flour which has high amounts of betaine and choline reduces the risk of heart diseases and Osteoporosis.Addition of the nuts added to the goodness.Pistachios are source of iron which helps in increasing the haemoglobin and RBC level in the blood.Cashews are a rich source of magnesium which keep our nerve system relaxed and reduce muscle spasms. Badam is vital for brain development and also regulation of cholesterol.
    Atta Laddoo Recipe

    Method:

    1. Dry roast all the nuts in a kadai ,see to it that they don't change colour.This step is to ensure that the are nuts crisp to get a fine powder.Transfer it to a plate.In the same pan dry roast the atta /whole wheat flour till it changes colour.This may take around 8 to 10 minutes depending on the quantity you are using.Do this step in low heat and constant stirring to avoid the flour getting burnt.Keep it aside.
    2. Now powder the cooled nuts to a fine powder and transfer it to a bowl.In the same mixie jar you can now powder the sugar to a fine powder.
    3. Now mix well the roasted atta ,powdered sugar and nuts powder in a wide bowl .Heat the ghee and add it to the atta mix , make laddoos and enjoy them.
    Atta Laddoo Recipe

    My Notes:

    • You can reduce the amount of sugar if you prefer your sweets on the milder side.
    • Amount of ghee used may increase to 1/3 of a cup depending on the atta used.
    • If you use home made atta the laddoos may turn out in brown shade.
    • You can add elaichi powder to the mix before adding ghee and mix it well.Actually I forgot to add it.
    • Adding nuts is your choice you can omit them completely or just add chopped nuts.
    • Mine was a small quantity so I added all the ghee at the same time if doing in large quantity do so in batches.
    • You can sieve the atta flour before roasting but I didn't

    Thursday 9 January 2014

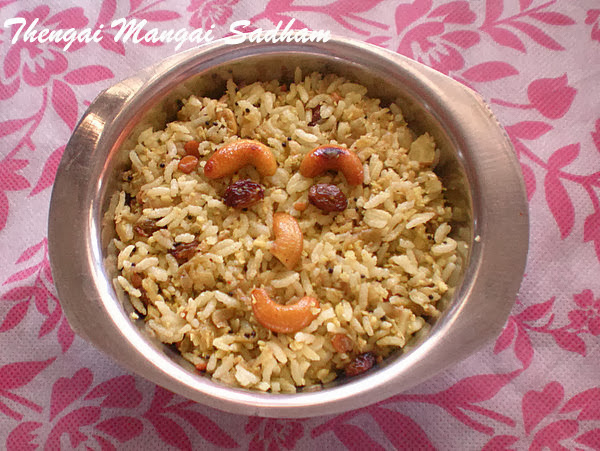
    Thengai Mangai Sadham Recipe

    This thengai mangai sadham is one of amma's speciality which is a favourite among my friends.When I saw mangoes in the market I was reminded of this rice and wanted to try it .We love the sweet and sour taste of this rice.It goes well with any spicy veggie or just chips is fine.This rice tastes best when made with half ripe mangoes.My daughter is in favour of any variety rice instead of the same old sambar and rasam daily.We prefer having variety rice atleast once in a week, mostly Fridays is variety rice day in our house.The addition of raisins and cashews add richness to this but weight watchers can skip cashews.I tried this last week and it came out well,do try this.
    Mangoes are rich in vitamin C ,thus help in building better immune system.Raw mango is a good source of pectin which gives a good cure for gastro-intestinal disorders.Raisins contribute to bone health,cure anaemia as they are a rich source of calcium,iron.This rice combines the goodness of both mangoes and raisins.
    Thengai Mangai Sadham Recipe

    Method:

    1. Dry roast the grated coconut and transfer it to a plate.In the same kadai heat oil and add the items in the "to temper" list .Now add the grated mangoes and saute till it shrinks,you can now add the turmeric powder and salt and saute it.
    2. Add the roasted coconut to the kadai and mix well.Now add the cooled rice and mix everythig well.check for seasoning and serve with any curry or with just chips or appalam.
    Thengai Mangai Sadham Recipe

    My Notes:

    • This rice is best suited for lunch box,especially for kids who love to nuts and raisins .
    • You can also add roasted ground nut in place of cahews or both.
    • Raisins add a sweet punch to the rice as against the sour taste of the mango.
    • Dry roasting of the coconut brings out a good aroma.
    • I would suggest you try this dish with half ripe mangoes for a much better taste.
    • You can also use cuury leaves for seasoning.

    Tuesday 7 January 2014

    Sepankizhangu/Taro Root Roast Recipe

    Sepankizhangu or Taro root is one of my favourite veggies. Even as a kid I would like this veggie this fry/ roast is a regular in our house hold as sharu is a great fan of this fry.Amma used to fry this in a iron kadai,which would need a lot more oil so that the taro root doesn't stick to the kadai and we literally have to baby sit this fry,but now I have the luxury of a non stick pan so I can sit back and relax a little till the dish is roasted well unlike a iron kadai where it turns black. Amma used to buy this and keep it for a week or so then cook it as fresh taro root was believed to cause itchiness in the tongue,now a days I cook it immediately (may be it is already old enough in the shop itself ha ha).
    I was amazed to find out that sepankizhangu has numerous health benefits.Its a rich source of dietary fibre and has anti ageing properties, I was amazed at the fact that the glycemic index of taro roots is low and is free from gluten,it also has the property to lower blood pressure and is rich in vitamin c thus helping in bettering your immune system.So after knowing about great health benefits of the taro root I have decided to cook it much often.
    Sepankizhangu Roast Recipe

    Method:

    1. Heat oil in a pan, add the mustard seeds and once they splutter and the curry leaves.
    2. Now add the sliced sepankizhanghu and saute it for 2 minutes , add the powders and salt and toss it so that all the masala powders coat well.
    3. While tossing take care not to break the slices,leave the stove on sim and keep attending to the dish every 5 or 10 minutes and toss it so that both the sides are roasted well.This step needs patience, it may take around 15 to 20 minutes for the yam to get the roasted texture.
    4. Switch off the stove and serve the sepankizhangu roast with sambhar rice or curd rice or morkhuzhambu.we had ours with sambhar it was great.
    Sepankizhangu Roast Recipe

    My Notes:

    • The sepankizhangu has to be cooked firm and not mushy.I pressure cooked mine in an open bowl without direct contact with water, this helps in avoiding over cooking.
    • Adding Fennel seeds powder gives a distinct aroma to the dish,you can even use fennel seeds while tempering instead of the powder.
    • Mine was mildly spiced you can increase the red chilly powder as per your taste.
    • You can either slice to thin circle like me or thin strips vertically .
    • Using non stick pan had reduced the oil else this may consume more oil if prepared in an iron kadai.

    Sunday 5 January 2014

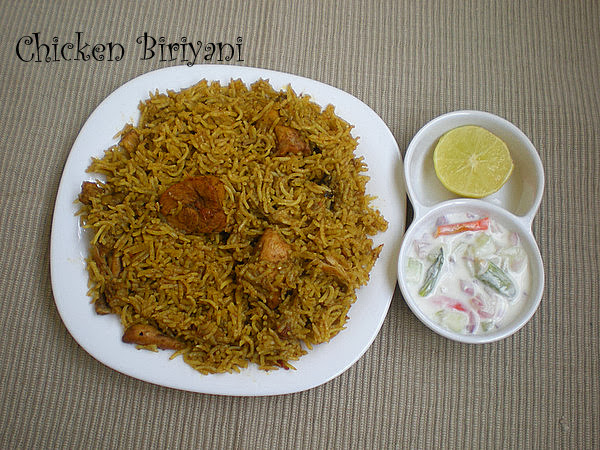
    Chicken Biriyani (pressure cooker method)Recipe

    Hope everybody had a great weekend.Ours went on well.Saturday was a busy day with the Sharu having an open day at school and we also went on a shopping for buying crockery ,weekly veggies,a visit to the grocer and so on.My daughter prefers to have non-veg on sundays especially chicken .She wanted to have biriyani so we decided on chicken biriyani this sunday.I decided on going ahead with amma recipe.The biriyani came out well and Sharu complimented it by comparing it with amma's biriyani.Now a days amma has started adding kal pasi and marathi moggu in her biriyani this makes the dish very aromatic, so I also added this for the first time and came out well. I always use the pressure cooker for biriyani should try cooking with dum the next time ,will try it and post it soon.
    Chicken Biriyani Recipe

    Method:

    1. First grind the ingredients in the "to grind" list to a fine paste.Now clean the chicken and marinate it with the ingredients in the "to marinate".
    2. Heat oil + ghee in a pressure cooker and add the items in the "to temper" list followed by the chopped onion ,tomato and ginger garlic paste and saute well, now add the ground masala followed by the marinated chicken,salt and the powders.Stir well till all the masala is coated well and till oil oozes.
    3. Add a little water if the masala is too dry and pressure cook for 2 whistles or till the chicken is cooked(not mushy) .While the chicken is cooking you can rinse the basmati rice just once and soak it in 1 cup of water for about 15 minutes.
    4. After the chicken is cooked check for seasoning .The most important step here is to measure any water that is there in the cooked chicken,if there is water just transfer it to the measuring cup and add extra plain water to it so that it measures to one cup.
    5. Now drain the water from the rice (1 cup )and add this water to the cooker,let it boil.Now add the drained rice to the cooker ,check for seasoning close the cooker. cook for 1 whistle on high and cook in sim for 1 more whistle.Switch off the stove and fulf up the rice once the pressure releases.
    6. Now your chicken Biriyani is ready to serve with raita or any gravy of you choice or just plain curd.
    Chicken Biriyani Recipe

    My Notes:

    • Although kal pasi and marathi moggu are optional they add a great aromea to the biriyani.
    • The amount of water need is important , I prefer the rice to water in the ratio 1:2 with this ratio the rice is well cooked soft but not mushy .
    • Please adjust the red chilly powder and green chillies as per your spice level.
    • You are free to modify the ghee and oil as per your liking but I would recommend you use atleast this amount of ghee for better flavour.

    Thursday 2 January 2014

    Rajma Masala - Sweet and sour Rajma Gravy without tomatoes Recipe

    Rajma or kidney beans is packed with health benefits.In our house we prepare rajma curry or gravy at least once in a month.I read that the calcium,iron and folic acid content in rajma is higher than most other legumes.We usually consume legumes at least twice a week.So was always in the hunt for new recipes using legumes so that my daughter doesn't get bored of the same old dish every other week.Kids get bored easily with food stuffs and my daughter goes blog hoping and wants me to try new recipes everyday.Ha ha kids are kids so I should ensure that I prepare dishes that she loves to eat.She loves rajma in any form,especially gravy with her roti. This recipe I tried about 2 weeks back from a newspaper article.It sounded interesting , rajma gravy without tomatoes and garam masala so planned to try it out the next day itself.I had made changes to the original recipe to suit our taste.I did have qualms whether the dish may come out dry without tomatoes but to my surprise it was creamy.We loved the masala as it was a sweet and sour version.Now to the recipe
    Rajma Masala Recipe

    Method:

    1. Pressure cook the rajma for 4 to 5 whistles or till they are soft yet not mushy.Strain the water and reserve for future use. Now heat oil in a pan and tip in the fenugreek seeds,now add the onion followed by the ginger garlic paste and fry till raw smell leaves.
    2. Now add the powders and salt and saute well .Add the rajma alone (without water)and stir till all the masala coats well.Take a ladle full of the fried rajma and puree it after it cools down.Add the reserved water to the pan followed by the rajma puree and let it boil well.
    3. You can add the tamarind paste now check for seasoning add the grated jaggery and let it boil till the gravy attains the required consistency.Garnish with coriander and serve with rice or roti.
    Rajma Masala Recipe

    My Notes:

    • The original recipe called for mustard oil but I used sunflower oil.
    • There was also an addition of kala namak which I did not add,may be should try adding this for a chaat like flavour.
    • The success of this dish depends on the right balance of the tamarind and jaggery with a hint of spice.This balance depends on ones personal taste.
    • I used the light red coloured rajma, you can used the red ones too,but the black ones don't cook as soft as the other two available in India.